

Learn how to create a custom ChatGPT that connects securely to your WordPress site, allowing you to search and publish posts using the REST API and application passwords.
Table of Contents
- Why Build a WordPress GPT Assistant
- What You Need Before Starting
- Set Up WordPress REST API Access
- Generate a WordPress Application Password
- Encode Your WordPress Credentials Securely
- Create Your Custom GPT in ChatGPT
- Add Your WordPress API Schema
- Test Your GPT Assistant
- Publish GPT
- Wrap Up
Why Build a WordPress GPT Assistant
Connecting a custom GPT to WordPress opens up natural language workflows for content creation and content discovery. This assistant can:
- Search for existing posts by keyword
- Create and publish new posts with formatted content
- Eliminate the need to log into WordPress for routine tasks
With no plugins, no external tools and no coding required.
What You Need Before Starting
- A WordPress site (version 5.6+)
- Administrator access to generate an application password
- HTTPS enabled (required for authentication)
- A ChatGPT Pro account to build a custom GPT
Set Up WordPress REST API Access
- Open your browser and go to:
https://yourdomain.com/wp-json/Replaceyourdomain.comwith your actual site. - You should see a JSON response confirming that the REST API is active.
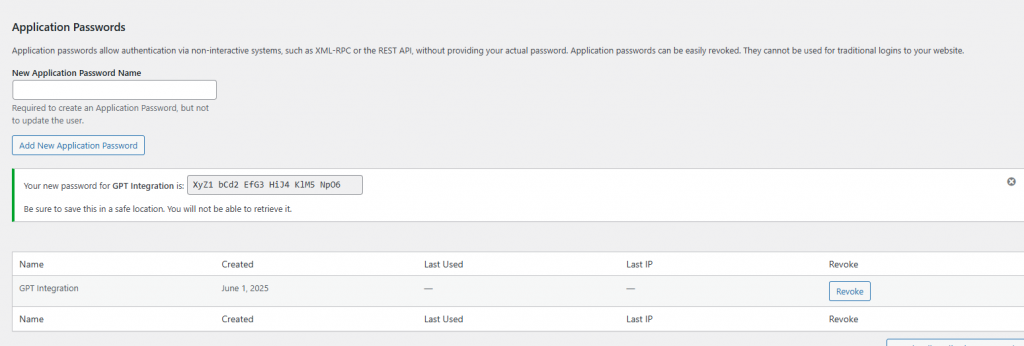
Generate a WordPress Application Password
- Log into your WordPress admin.
- Go to Users > Profile (or Your Profile).
- Scroll to Application Passwords.
- Enter a name like
GPT Assistantand click Add New Application Password. - Copy the generated password and store it temporarily.
- WordPress adds spaces to application passwords. Remove them if you’re encoding manually; the code we’ll share shortly will handle it for you.
Encode Your WordPress Credentials Securely
To authenticate with WordPress, ChatGPT needs your credentials encoded in Base64. If you prefer to do this yourself, combine your WordPress username and application password with a colon (e.g., username:password), then Base64-encode that string using a tool or programming method of your choice. If you’d rather skip that step, here are two secure and simple options we’ve created, one using a browser bookmark and one using your browser’s developer console.
Option 1: Bookmarklet Method
This method lets you generate the Base64-encoded credentials with a single click using a browser bookmark.
How to Set It Up
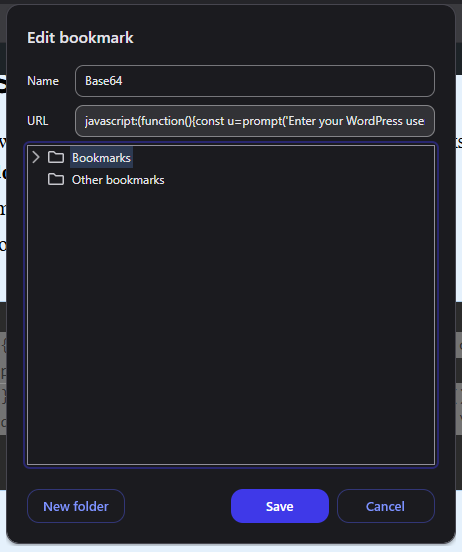
- Create a new bookmark in your browser (right-click on bookmarks bar > Add Page or Add Bookmark)
- Name it something like:
Encode WP Auth - Paste this code into the URL or Location field:
javascript:(function(){const u=prompt('Enter your WordPress username');const p=prompt('Enter your application password (with or without spaces)');if(u&&p){const encoded=btoa(`${u}:${p.replace(/\s+/g,"")}`);navigator.clipboard.writeText(encoded).then(()=>alert('Copied to clipboard:\n' + encoded)).catch(()=>alert('Here is your encoded string:\n' + encoded));}})();
- Click Save
How to Use It
- Click the bookmark
- Enter your WordPress username and application password when prompted
- It will automatically copy the Base64 string to your clipboard (you may be prompted to allow clipboard access)
- Paste the result into the Authentication input field in the GPT builder later
- Save it somewhere if you think you might copy something else in the meantime.
You can delete the bookmark when you’re done or save it in a folder for future use.
Option 2: Browser Console Method
If you prefer not to create a bookmark, you can run the same logic directly in your browser’s developer console.
How to Use It
- Open your browser and navigate to any site (your WordPress site is fine)
- Open Developer Tools (Right-click > Inspect > Console tab)
- Paste this code and hit Enter:
const u = prompt("Enter your WordPress username");
const p = prompt("Enter your application password (with or without spaces)");
if (u && p) {
  const encoded = btoa(`${u}:${p.replace(/\s+/g, "")}`);
  console.log("Your Base64 encoded string:");
  console.log(encoded);
}
- Copy the result manually from the console output
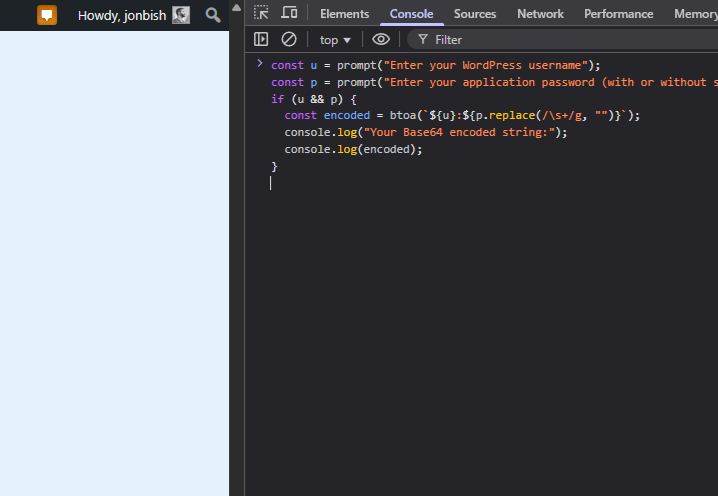
This is the same result as the bookmarklet, but without automatic clipboard copy.
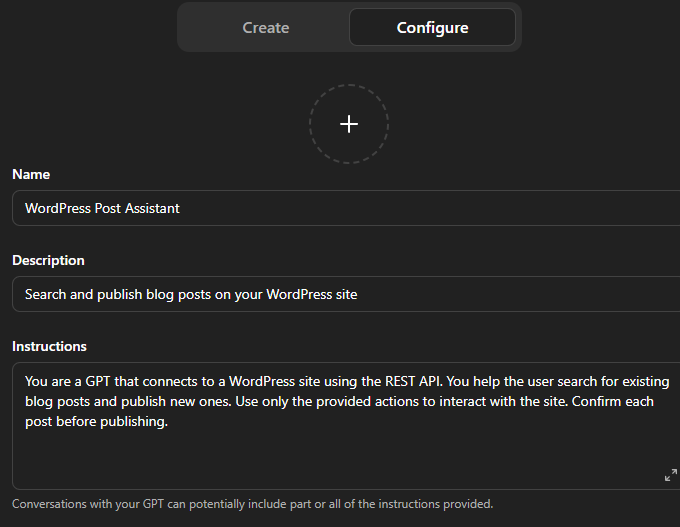
Create Your Custom GPT in ChatGPT
- Go to ChatGPT
- Click your name > My GPTs > Create a GPT
- Walk through the setup:
- Name: WordPress Post Assistant
- Description: Search and publish blog posts on your WordPress site
- Instructions:
You are a GPT that connects to a WordPress site using the REST API. You help the user search for existing blog posts and publish new ones. Use only the provided actions to interact with the site. Confirm each post before publishing.
Set Authentication to Basic Auth
Still within the Configure tab, scroll down to Actions and click Create new action.
- Choose Authentication Type: API Key
- Set Auth Type: Basic
- Paste your Base64 encoded string (from the bookmarklet or console)
Add Your WordPress API Schema
Once Authentication is in place, right below it you will see the Schema input. Paste this full OpenAPI schema:
{
  "openapi": "3.1.0",
  "info": {
    "title": "WordPress Blog API",
    "version": "1.0"
  },
  "servers": [
    {
      "url": "https://yourdomain.com/wp-json/wp/v2"
    }
  ],
  "paths": {
    "/posts": {
      "get": {
        "operationId": "searchPosts",
        "summary": "Search blog posts",
        "parameters": [
          {
            "name": "search",
            "in": "query",
            "required": true,
            "schema": {
              "type": "string"
            },
            "description": "Search term for post title or content"
          }
        ],
        "responses": {
          "200": {
            "description": "Search results"
          }
        }
      },
      "post": {
        "operationId": "createPost",
        "summary": "Create a blog post",
        "requestBody": {
          "required": true,
          "content": {
            "application/json": {
              "schema": {
                "type": "object",
                "properties": {
                  "title": { "type": "string" },
                  "content": { "type": "string" },
                  "status": {
                    "type": "string",
                    "enum": ["publish", "draft"],
                    "default": "draft"
                  }
                },
                "required": ["title", "content"]
              }
            }
          }
        },
        "responses": {
          "201": {
            "description": "Post created successfully"
          }
        }
      }
    }
  }
}
Replace https://yourdomain.com with your actual WordPress site URL.
It will look like this within the Edit Actions Schama input:
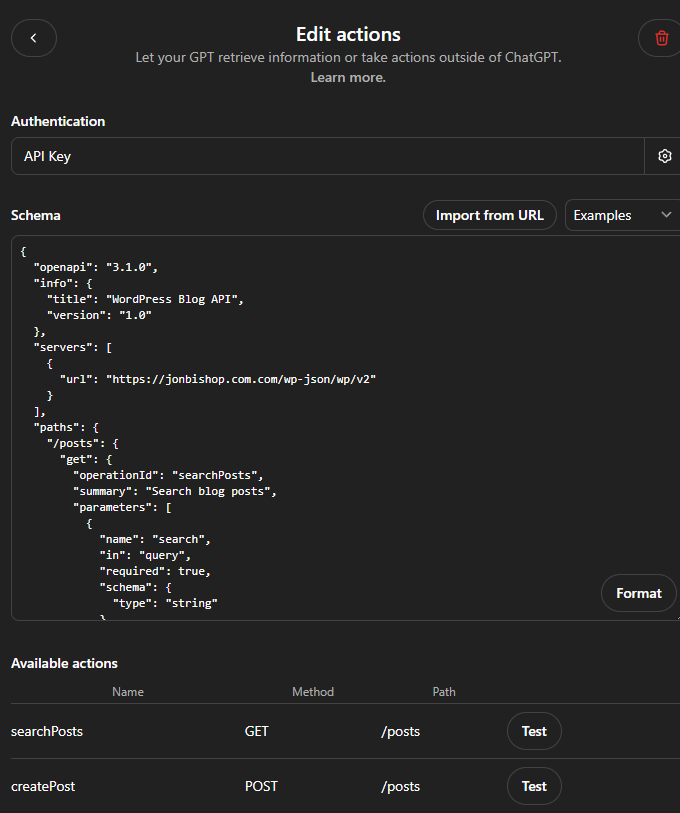
You’ll know it’s working if there are no errors and you see our custom action under Available actions.
Once the full JSON is in place and valid, click the little back arrow in the top left to add the action.
Test Your GPT Assistant
Now in Configure > Preview panel, try prompting your GPT:
- “Search for posts about newsletter strategy”
- “Create a blog post titled ‘5 Tips for Better Blog Engagement’ and save as draft”
It should:
- Use the
/posts?search=...endpoint for search - Use the
/postsendpoint to publish new content
You can verify the results in WordPress > Posts.
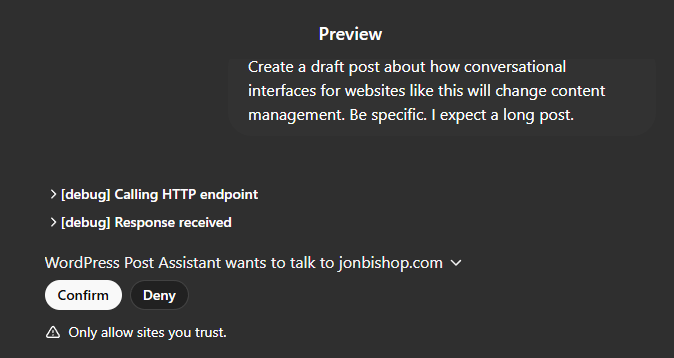
The GPT will call your WP Rest API. If everything is working:
- You should see a message like “WordPress Post Assistant wants to talk to yoursite.com”
- Click confirm to allow ChatGPT to talk interact with the WP Rest API.
Publish Your GPT for Personal Use
- In the GPT builder, click Create
- Click Only me
- Click Save
This will make your GPT available only to you unless you choose to share it publicly.
A Better Way
While integrating with WordPress using the official WP Rest API works, it’s not the best experience. If you add too many endpoints you’ll eventually hit a limit. Also, updating the entire post content each time you want to make a small update is prone to error.
So I built a plugin to solve these problems. GPT Toolkit creates custom endpoints, purpose built for ChatGPT. Furthermore, it has safety nets built in to minimize the amount of damage it could do with full page updates, accidentally editing live content, etc.
It’s called Connect to GPT and you can download it here. Just download and install the plugin and go through the quick onboarding process.
Wrap Up
You’ve now created a powerful, secure ChatGPT assistant that can search and publish content to your WordPress blog without writing a single line of code. It’s ideal for bloggers, content managers or marketers looking to streamline their publishing process with AI.
For future enhancements:
- Add endpoints for pages, media or custom post types
- Use post status
draftto review before publishing - Build a companion GPT to handle media uploads or comments