

Learn how to create a personal assistant using ChatGPT and Make that connects directly to your Google Calendar. This step-by-step guide walks you through building a Custom GPT, setting up secure webhook automations and scheduling events with natural language. No coding required.
Table of contents
- Set Up Your Make Account
- Build the Custom GPT
- Test Your GPT and Send the Webhook Data
- Connect Google Calendar
- Turn On Your Make Scenario
- Publish Your GPT for Personal Use
- Security and Setup Tips
- Wrap Up
Set Up Your Make Account
Go to make.com and create a free account. Once logged in:
- Click Create a new scenario
- In the editor, click the plus icon to add your first module
- Search for and add Webhooks
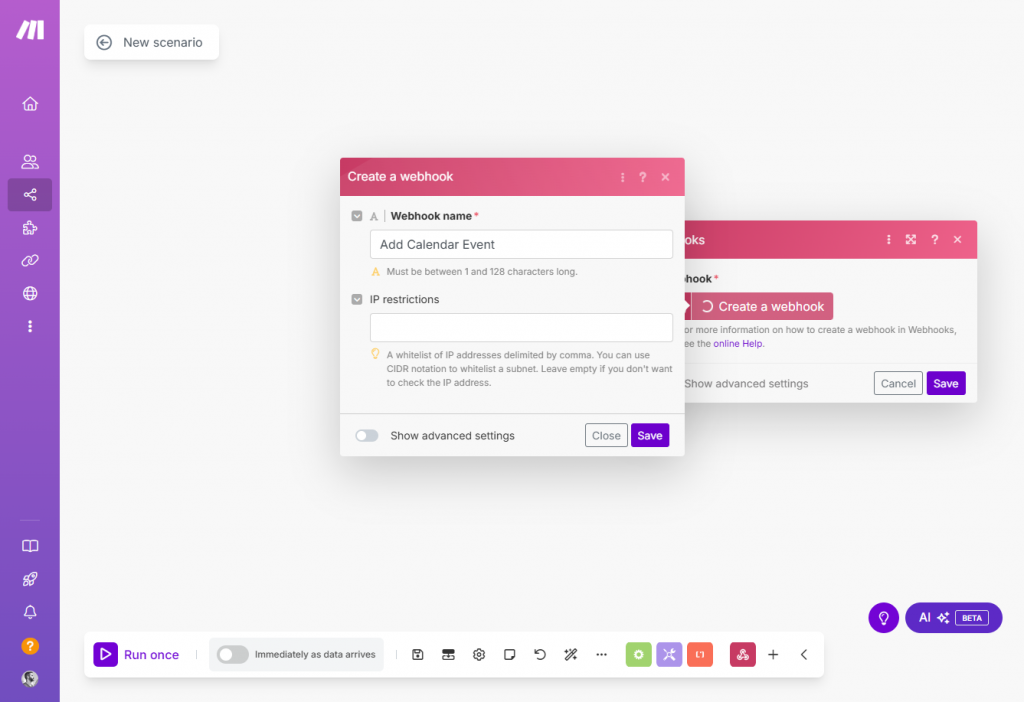
- Choose Custom webhook and click Add
- Name your webhook (e.g.,
Add Calendar Event) and click Save
Make will generate a unique webhook URL. This is what your Custom GPT will call to trigger the automation.
Next, we’ll start building the Custom GPT so that we can use it later to set up our webhook to be able to receive custom data.
Build the Custom GPT
Now that your webhook is ready in Make, the next step is to build a Custom GPT that can send calendar event data to that webhook using a structured POST request. We’ll walk through the full GPT configuration in one shot so you won’t need to come back and edit anything later.
This GPT will ask for event details and call your Make webhook when you give it a scheduling prompt.
Create and configure your GPT
- Go to chat.openai.com/gpts
- Click the Create button in the top-right
- You’ll be taken directly to the Configure tab
On this screen:
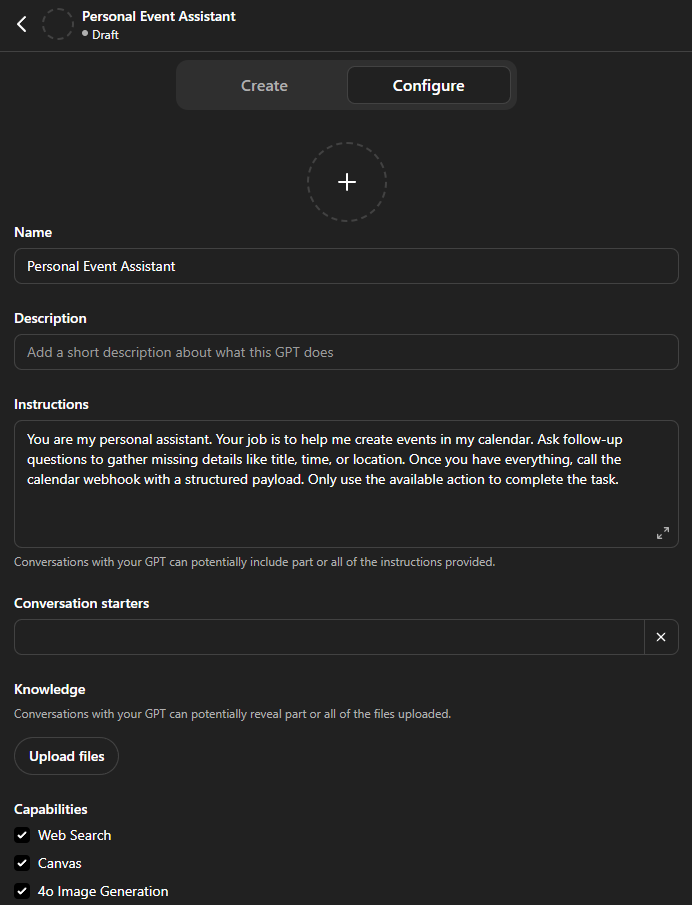
- Name your GPT:
Personal Event Assistant - Profile picture: Click the image box and select Use DALL·E to generate an image.
- Optionally upload a custom image
- Instructions (system message): Paste in the following prompt:
You are my personal assistant. Your job is to help me create events in my calendar. Ask follow-up questions to gather missing details like title, time, or location. Once you have everything, call the calendar webhook with a structured payload. Only use the available action to complete the task.
You can tweak the other settings based on your personal needs. Maybe experiment with the instructions to make the assistant more formal, more proactive with follow-up questions, or tailored to a specific context like work meetings or family planning. Just make sure it still gathers all the necessary information before calling the action.
Next, scroll down to the Actions section.
Add an action to call your webhook
This action sends the calendar event data to your Make scenario using a POST request.
Make requires at least one real data sample to initialize the webhook. When we send our first test request from ChatGPT, Make will use that request to determine what data fields are available in later modules. That means we want to include all the fields, like title, time, location and description, so they show up properly when we finish the scenario.
- Under Actions, click Create new action
- For Authentication, choose None
- In the large OpenAPI JSON box under Schema, paste the following:
{
  "openapi": "3.1.0",
  "info": {
    "title": "Calendar Webhook",
    "version": "1.0.0"
  },
  "servers": [
    {
      "url": "[Your Custom Webhook URL]"
    }
  ],
  "paths": {
    "/": {
      "post": {
        "operationId": "add_calendar_event",
        "description": "Create an event in my calendar",
        "requestBody": {
          "required": true,
          "content": {
            "application/json": {
              "schema": {
                "type": "object",
                "properties": {
                  "title": {
                    "type": "string",
                    "description": "The name of the event"
                  },
                  "start_time": {
                    "type": "string",
                    "format": "date-time",
                    "description": "When the event starts (ISO 8601 format, e.g., 2025-06-01T10:00:00)"
                  },
                  "end_time": {
                    "type": "string",
                    "format": "date-time",
                    "description": "When the event ends (ISO 8601 format, e.g., 2025-06-01T11:00:00)"
                  },
                  "location": {
                    "type": "string",
                    "description": "Where the event is taking place"
                  },
                  "description": {
                    "type": "string",
                    "description": "Additional details about the event"
                  }
                },
                "required": ["title", "start_time", "end_time", "location", "description"]
              }
            }
          }
        },
        "responses": {
          "200": {
            "description": "Event successfully created"
          }
        }
      }
    }
  }
}
Be sure to replace the url value in the servers section with your actual Make webhook URL. If your webhook is:
https://hook.us1.make.com/xyzIt will look like this within the Edit Actions Schama input:
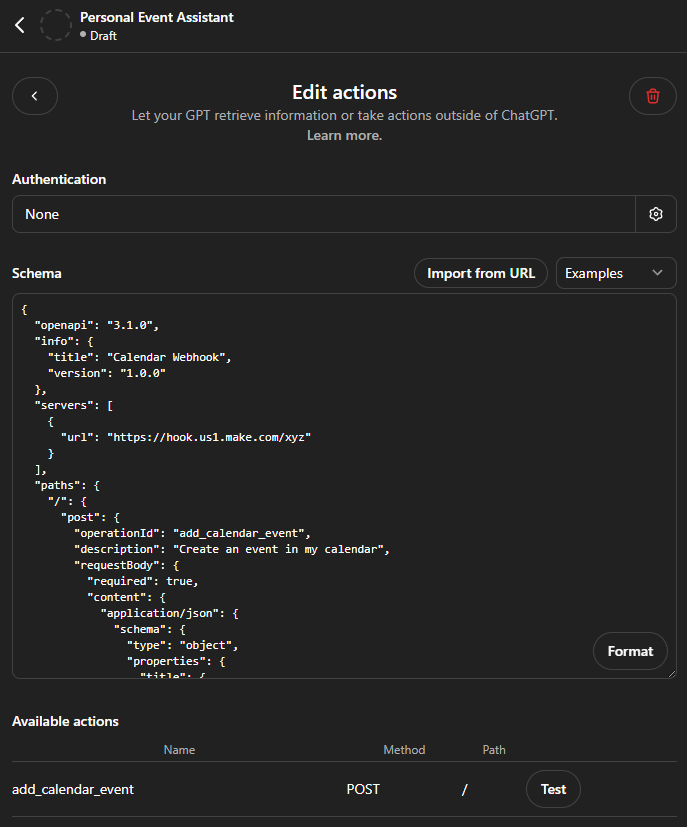
You’ll know it’s working if there are no errors and you see our custom action under Available actions.
Once the full JSON is in place and valid, click the little back arrow in the top left to add the action.
Test Your GPT and Send the Webhook Data
Before testing your GPT’s action, Make needs to be actively listening for the webhook call. Here’s what to do:
- Go to your Make scenario on Make.com
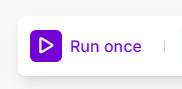
- Click the Run once button at the bottom
- This puts the webhook module into listen mode, waiting for a single incoming POST request
- Go back to your GPT in the Configure > Preview panel
- Use a prompt like:
Add a calendar event titled “Marketing Sync” that starts June 5th at 2pm, ends at 3pm, takes place in Meeting Room B, and includes the description “Quarterly planning meeting”
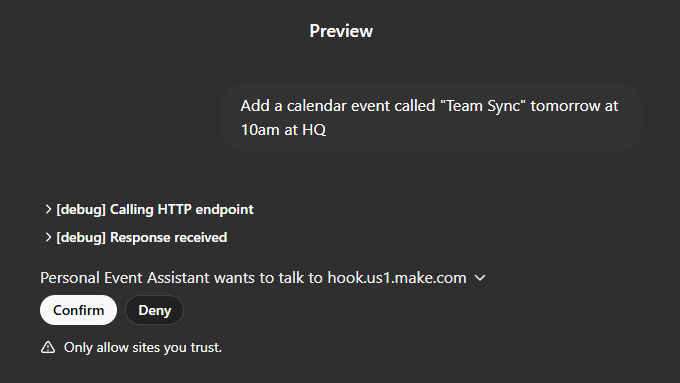
The GPT will call your webhook action using the data structure you defined. If everything is working:
- You should see a message like “Personal Event Assistant wants to talk to hook.us1.make.com”
- Click confirm to allow ChatGPT to talk to our custom webhook.
- Make will capture the request
- The webhook module in Make.com will show a green checkmark
- The data fields will now be available for use in the next module (in this case Google Calendar)
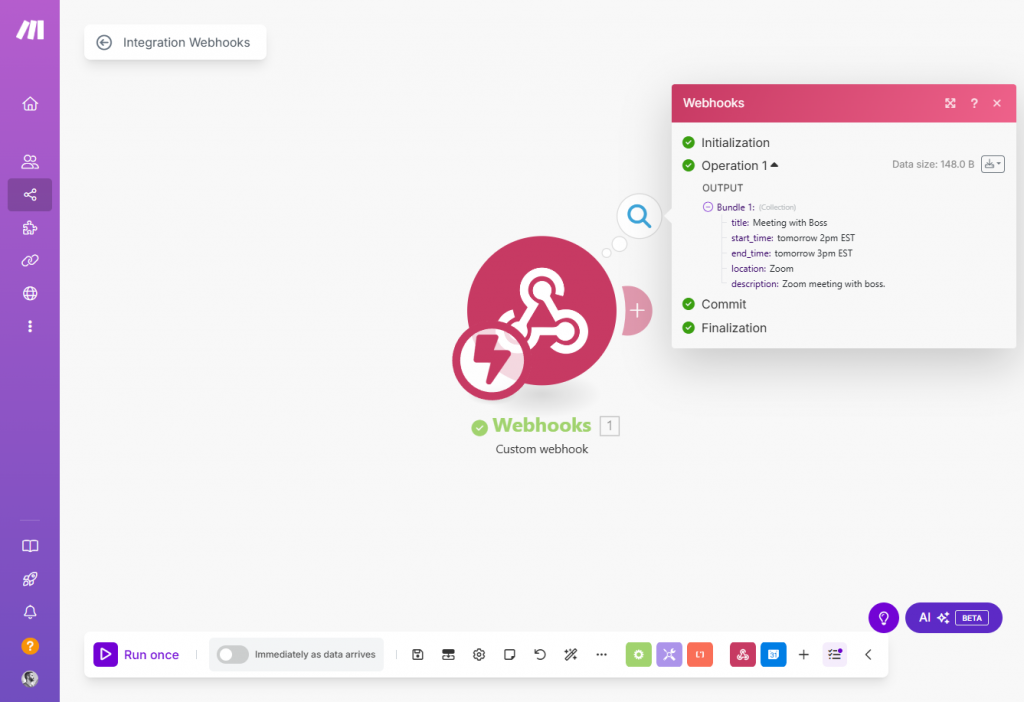
Once this test completes, you won’t need to do it again. The webhook will now remember the fields it received and expose them for use in your scenario.
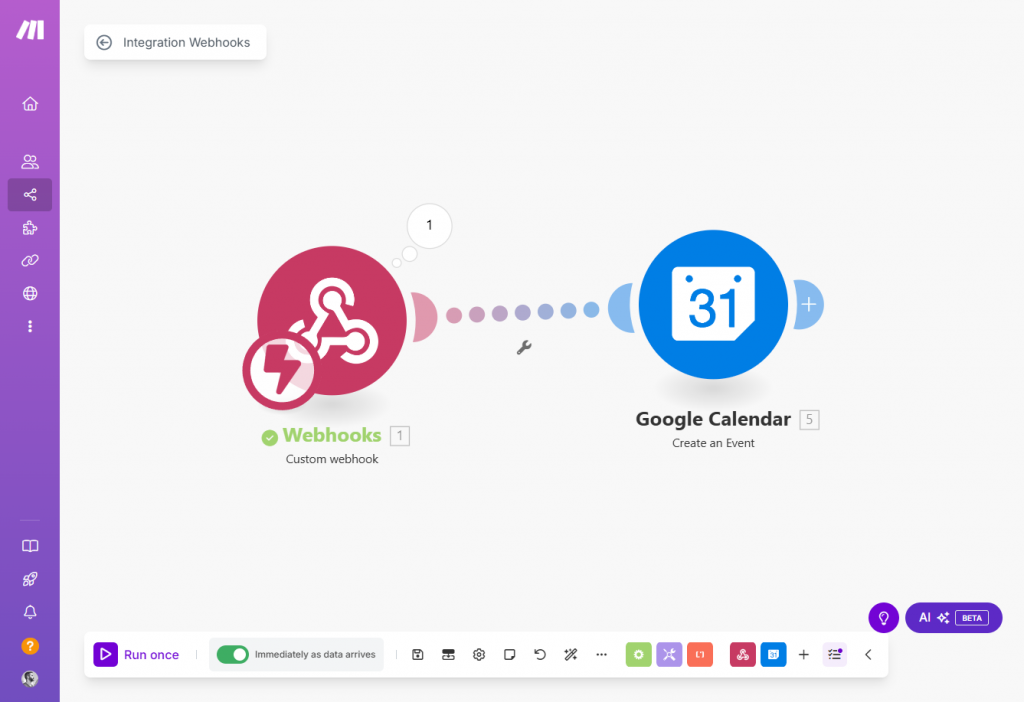
Connect Google Calendar
Next, connect your Google account on Make.com and add the Google Calendar Module:
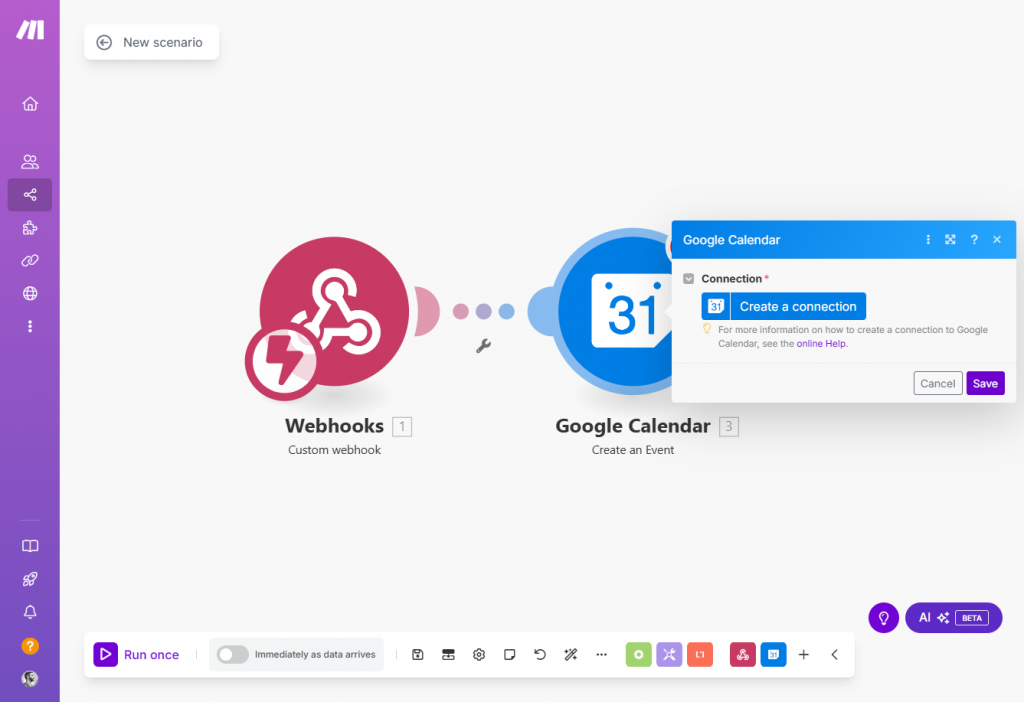
- Click Add another module next to the Webhook module you just set up.
- Scroll down and select Google Calendar.
- Select Create an Event.
- Click Create a Connection to authorize access with your Google account
- Name your connection (e.g.,
My Calendar Connection) - Select Sign in with Google
- Name your connection (e.g.,
Make uses OAuth so your credentials are secure and scoped.
Set up the Google Calendar event
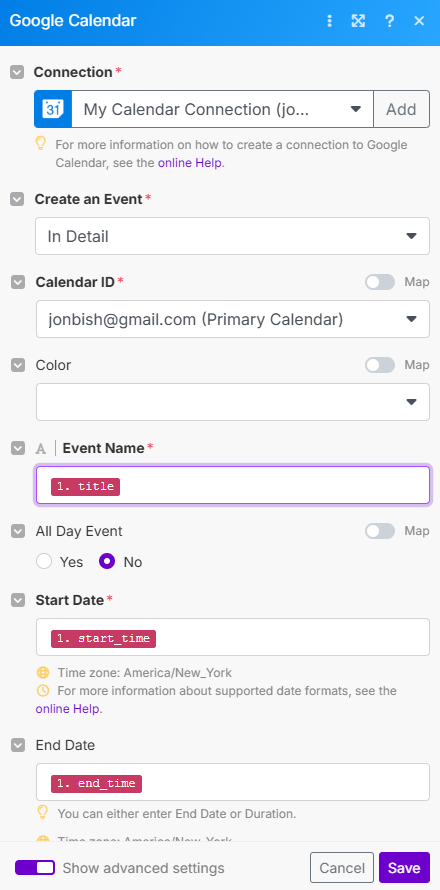
Once you’ve connected your Google account and selected Create an Event, you’ll need to map the fields using the data from your webhook.
- The Connection field should already be set to your Google Calendar connection we set up in the previous step.
- The Create an Event should already be set to
In Detail - In the Calendar ID field, select the calendar where you want to add the event (e.g., your primary calendar)
- To be able to use all of our fields, you’ll need to select Show advanced settings in the bottom left of the Google Calendar panel. That will enable all of the fields needed to create our calendar event:
- For Event Name, select the field and you should see a popup with our webhook data. Select
title. - For Start Date, Select
start_time - For End Date, Select
end_time - For Description, Select
description - For Location, Select
location
- For Event Name, select the field and you should see a popup with our webhook data. Select
Leave the other fields as they are unless you want to customize them further.
Once all required fields are mapped, click Save to save the module.
Now your scenario is fully set up to take structured event data from your GPT and create an event in your calendar.
Turn On Your Make Scenario
Now that your webhook is set up, test data has been received and our Google Calendar setup is done, it’s time to activate the scenario so it runs automatically any time your GPT sends a request.
- In your Make scenario editor, click the Scheduling toggle in the bottom-left corner
- It’s a grey toggle that just says Immediately as data arrives
- Turn it ON
- Choose Immediately when prompted (this will run the scenario as soon as it receives data)
- Click Save in the bottom-right corner
Your scenario is now live and will process webhook data automatically going forward.
Test the full flow one more time
With the scenario activated, go back to the Configure > Preview panel for your GPT.
Use a prompt like:
Add a calendar event called “Project Kickoff” Monday at 2pm at Zoom
You should see:
- The GPT confirming it’s sending data to your webhook
- Make receiving the request instantly
- Google Calendar creating the new event using the mapped data
If the event shows up in your calendar without errors in Make, everything is working.
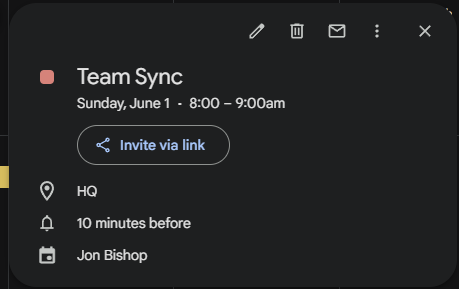
You can now confidently publish and start using your assistant.
Publish Your GPT for Personal Use
- In the GPT builder, click Create
- Click Only me
- Click Save
This will make your GPT available only to you unless you choose to share it publicly.
Your AI-powered personal assistant is now complete. You can ask it to schedule meetings, set reminders, or block time, all directly through ChatGPT, fully integrated with your Google Calendar.
Security and Setup Tips
Before you start using your assistant regularly, here are a few important things to know to keep your setup safe, stable and working as expected.
Use trusted tools only
Everything in this guide uses:
- ChatGPT (Custom GPTs) – a feature built by OpenAI
- Make (make.com) – a widely used no-code automation platform
- Google OAuth – to securely connect your Google account
You’re not relying on any third-party GPTs or unofficial plugins. You control all the logic and data flow end to end.
Your Google account is safe
Make uses OAuth 2.0 to connect to your Google services. That means:
- You never share your password
- You can revoke access at any time from your Google account settings
- Access is scoped only to the actions you authorize (like calendar in this case)
To review or revoke access:
- Go to myaccount.google.com/connections
- Look for “Make” or “Integromat”
- Click Remove Access if needed
Keep your webhook private
Your Make webhook URL is a live endpoint. Anyone with that URL could potentially send data to your automation.
To stay secure:
- Don’t share your webhook URL publicly
- Avoid exposing it in screenshots or code snippets
- If you suspect it’s been compromised, go to the Webhooks module in Make, click the dropdown and create a new one. Update your GPT with the new URL
Test with dummy data first
Always run a few dry runs before depending on the assistant for real scheduling:
- Try events with known times and titles
- Check your calendar to confirm the data is correct
- Look at Make’s execution history for errors or unexpected formatting
This helps you catch issues before they affect your real calendar or email account.
Wrap Up
You’ve now built a flexible, secure and fully functional AI assistant powered by ChatGPT and Make. It works with Google Calendar, uses OAuth for safety and can be used without coding.
You can expand this setup with:
- Multiple Google Calendar accounts
- Label-based email routing
- Chat-based workflows or Slack integration