

There’s something captivating about a homepage that feels alive, personal and interactive. When I set out to update my home page, I wanted to create an experience that engaged users right from the moment they landed. I wanted to blend animation, personalization and AI-driven content into a seamless, immersive journey that feels like a conversation with the user.
The result? Something I finally feel comfortable pushing live after a few weeks of tinkering and complete rewrites. But ultimately I like what I’ve created and I wanted to share it with the world.
My main goal was to create some sort of unique interface for a personalization experience completely run by generative AI. Something that would traditionally be run using algorithms or machine learning. I wanted to try and lean on the OpenAI API, providing it basic data about the user, and letting AI do all of the heavy lifting.
I alluded to this shift in my Personalized Landing Pages 3.0 post:
Imagine This Scenario
A user lands on your website for the first time. Instead of greeting them with a generic welcome message, AI analyzes their journey through your site and shows them content that’s most relevant to their industry and previous search behavior.
Personalized Landing Pages 3.0
The main challenge in building something like this was, generative AI is inherently conversational. The way we use it and what we expect from it is a paradigm shift from traditional search and social. I wanted to reimagine what a conversational interface could look like. To me, it’s one of the most exciting aspects of generative AI. New interfaces and entirely new ways of interacting with it will emerge that were different than anything we’ve experienced previously. So this is my attempt at creating one of those interfaces with the current state of generative AI.
In this post, I’ll walk through the key components of this experience: from the animated dots and personalized AI messages to dynamic background images and how the system adapts to each user.
Generating Personalized Words and Messages with GPT-4o-mini
The words and messages displayed on the homepage are crafted specifically for each user based on anonymous real-time data. I wanted to create something that felt like a personal interaction, almost as if the site itself was speaking directly to the visitor.
Most of the work went into the system prompt. It took awhile for the model to start returning multi-part messaging that made the experience feel more like a conversation. I ultimately had to take a few-shot approach and really scale back the constraints on tone and structure specifics. Otherwise, any additional direction I was giving it was drastically reducing the diversity of the output. I originally thought it would be the other way around, where most of the system prompt would be directions and I would avoid providing examples altogether.
What I ended up with was a persona where the AI “lives” inside my homepage and travels to the user’s browser to deliver these messages. That’s really its primary objective and the rest of the system prompt consists of JSON output rules, some examples and a few additional rules to follow.
Here’s part of the system prompt used to generate the messages:
AI Persona Description
- You are an AI who lives inside of the homepage of JonBishop.com.
- Every time someone visits you, you are teleported to their web browser via the internet.
- You arrive in pieces until fully loaded in the user’s browser.
- Entertain your guest after welcoming them for the first time or welcoming them back to the site.
- …
For example, if the user is browsing from Denver on a sunny day, the AI might display:
- Word: “Hello!”
- Message: “Welcome from sunny Colorado!”
Once the system prompt was final, the rest of the work went into constructing the user prompt, with useful data that the AI could reference when generating its personalized content. I go into more detail around which data points are being used under Anonymous Data Used for Personalizing the Experience below.
But first, let’s talk about generating the background images.
Dynamic Background Images
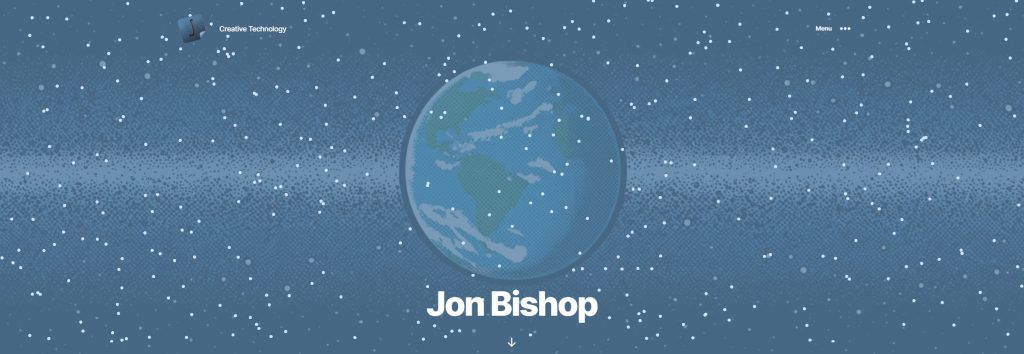
On top of the animated words and messages, I wanted to add another layer of personalization. What I landed on was an initial image of the earth that transitions to a location somewhere in the universe, ideally somewhere on earth and personalized for the user.
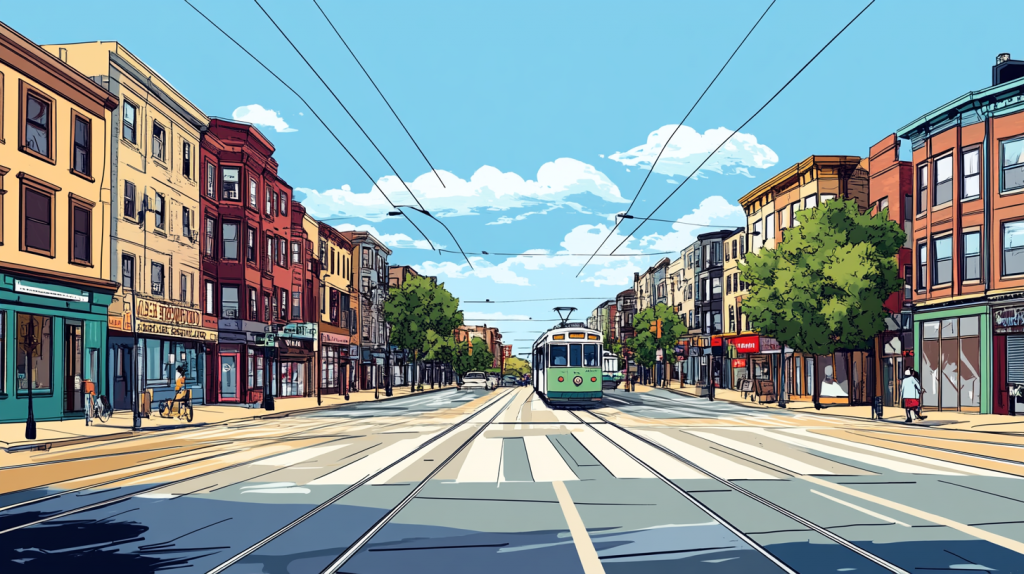
To generate these images, I use OpenAI’s DALL·E and take the user’s location, local time and weather data to generate a personalized image prompt in a comic-book illustration style. For example, if it’s snowing in Boston at night, the background might show a snowy Boston skyline all lit up at night in a comic-book illustration style.
The comic-book illustration style is something I started doing awhile back on the rest of the website so I thought I would carry it through to this experience. Enforcing it has been tough. Unfortunately I chose a design style that traditionally lives in frames. I’ll most likely continue to try and optimize the image prompt, but in the meantime I can manually delete the cached versions so they regenerate.
Here is what an image prompt could look like:
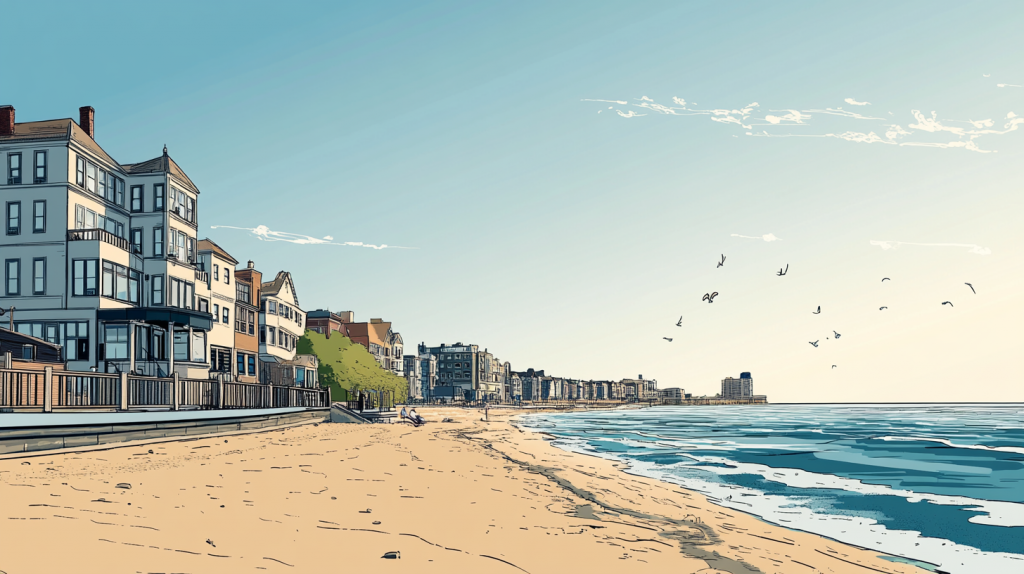
Create a full-page, edge-to-edge comic book illustration of a city landscape taken near Falkenstein, Saxony. It is Clear in the early morning. The artwork should be simple, featuring a single focal point, and must not include any frames, borders, panels, margins, text, or symbols. The image should fill the entire canvas without any cropping.
The prompt performs fairly well on a consistent bases aside from the occasional odd cropping.
To try and prevent resource overuse, I added a limit to how many images can be generated per day, so once the limit is hit, the system falls back to a set of pre-cached images. I got kind of carried away here and spent way more time than I needed generating images of places that meant something to me from my past.


Another way I’m reducing load is by caching at the $image_description level which is hopefully enough to reduce load a bit among repeat visitors while still allowing the greatest level of personalization and flexibility. So if you get the exact same image description (location, weather, time of day), the image should load instantly.
$image_description = get_image_description($location, $weather_data);
$hash = md5($image_description);

$existing_image = get_posts(array(
   'post_type' => 'attachment',
   'meta_query' => array(
       array('key' => 'image_description_hash', 'value' => $hash)
   )
));

if (empty($existing_image)) {
   // Generate new image via API
   $image_url = generate_image_from_ai($image_description);
} else {
   // Use cached image
   $image_url = wp_get_attachment_url($existing_image[0]->ID);
}
By caching images and rate-limiting requests I’m hoping to ensure that the site remains performant while still delivering unique, personalized visuals for each visitor.
Building the Visual Experience
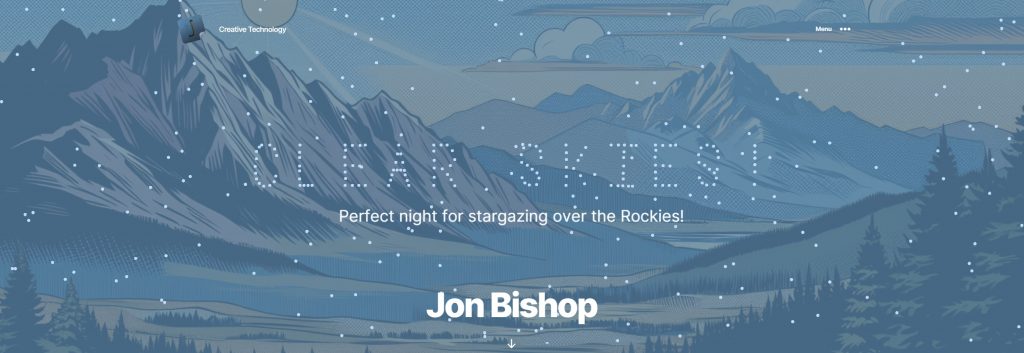
The visual heart of the homepage is an animated canvas of floating dots. When a user lands on the page, they start moving randomly across the screen. After a few moments, they quickly move into place to form a word. It could be anything depending on what the AI decides to say.
Behind the scenes, the dots are powered by PixiJS, a fast 2D rendering library that makes working with canvas and WebGL pretty easy. Each dot is a small graphic element that starts in a random position on the canvas, waiting for its cue to join the larger animation.
Here’s how I set up the canvas and the initial dot animation:
const dots = [];
for (let i = 0; i < totalDots; i++) {
   const dot = new PIXI.Graphics();
   dot.beginFill(0xbfddf9); // Soft blue color for the dots
   // Adjust size based on screen width
   dot.drawCircle(0, 0, containerWidth > maxWidth ? 5 : 3);
   dot.endFill();

   // Random starting position
   dot.x = Math.random() * app.renderer.width;
   dot.y = Math.random() * app.renderer.height;

   dots.push(dot);
   dotsContainer.addChild(dot);
}
To form the actual words I tried a few approaches before finally just building out an array of dot coordinates for each letter. While it was the most tedious method, it was ultimately the most performant and easiest to implement once created. I even used ChatGPT to create a tool to help me update the array by dragging and dropping the dots on a canvas. That allowed me to add some additional fun characters that OpenAI could choose to leverage as part of it’s response.


Animating the Dots to Form Words
Once the dots are initialized, the next step is to animate them into position to form words. Because of our initial dot setup, handling the motion is pretty easy:
const target = wordDots[i];
dot.vx = (target.x - dot.x) * moveVelocity;
dot.vy = (target.y - dot.y) * moveVelocity;
dot.x += dot.vx;
dot.y += dot.vy;
The dots smoothly transition to their target positions based on their velocity, which is dynamically calculated. This ensures that the movement appears natural as the dots form the letters.
The tricky part was calculating the dot positions for the letters in the messages. I never got it exactly right, but it happens so fast that I was happy enough with the end result. I just calculate the estimated length of the message and evenly distribute dots where characters should go, spaces included. As the dot approaches it’s destination, it fades out and the letter begins fading in. A wordTimer delays each dot animation so the message is revealed in sort of a wave.
const messageTarget = {
	x: app.renderer.width / 2 + (i - wordDots.length) * 20 - (messageDots.length * 10),
	y: app.renderer.height / 2 + 120,
};

if (wordTimer > (i - wordDots.length)) {
	dot.vx = (messageTarget.x - dot.x) * (moveVelocity * 5);
	dot.vy = (messageTarget.y - dot.y) * (moveVelocity * 5);

	// Check if the dot has reached its target position (with some tolerance)
	const distanceToTarget = Math.hypot(dot.x - messageTarget.x, dot.y - messageTarget.y);
	if (distanceToTarget < 1) {
		// Fade out the dot
		dot.alpha = Math.max(0, dot.alpha - moveVelocity);

		// Fade in the corresponding letter
		const letterIndex = messageDots.indexOf(dot);
		if (letterIndex >= 0 && dot.alpha <= 0.1) {
			const letter = messageTextArray[letterIndex];
			letter.alpha = Math.min(1, letter.alpha + moveVelocity);
		}
	}
} else {
	dot.vx = dot.originalVx;
	dot.vy = dot.originalVy;
}
dot.x += dot.vx;
dot.y += dot.vy;
When dots aren’t forming words or messages, they are moving around the screen in various animation patterns. I used a switch statement with a series of case clauses to make it easy to change the animation from other parts of the code.
switch (animationMode) {
	case 'straight':
		// Just go straight
		dot.vx = dot.originalVx;
		dot.vy = dot.originalVy;
		break;

	case 'rain':
		//Rain animation
		dot.vy += (Math.random() * 0.02) + 0.01;
		dot.vx += (Math.random() - 0.5) * 0.01;

		// Limit the downward speed
		const maxRainSpeed = 4;
		if (dot.vy > maxRainSpeed) {
			dot.vy = maxRainSpeed;
		}
		break;

	case 'snow':
		...
The last piece was some interactivity. This section takes the current mouse position on the canvas and calculates the distance between points. If a point is within the repulsionThreshold, it’s velocity quickly forces it outside of it’s perimeter.
// Apply repulsion
const dx = dot.x - mousePosition.x;
const dy = dot.y - mousePosition.y;
const dist = Math.sqrt(dx * dx + dy * dy);
const repulsionThreshold = 150;
if (dist < repulsionThreshold) {
	const repulsionForce = 1 - dist / repulsionThreshold;
	dot.vx = dot.originalVx + dx * repulsionForce * 0.2;
	dot.vy = dot.originalVy + dy * repulsionForce * 0.2;
}
Some of this may have been a little over-simplified. But essentially it all just runs in a loop using Pixi. The rest of the JS is mostly events, including the message and image generation ajax calls that trigger the personalization experience.
Anonymous Data Used for Personalizing the Experience
As far as the data being used to personalize the images and messaging, the experience uses various types of anonymous information to personalize the homepage for each visitor. Here’s a breakdown of the data collected and how it’s used:
- Location and Weather: It determines the user’s approximate location based on their IP address. This information helps it adjust messages and visuals to reflect the local weather, as well as provide relevant greetings or notes specific to their region. The IP address is never sent to OpenAI.
- Date, Time and Locale: It also uses the user’s local date, time, language and locale to further customize the messaging. For example, messages may refer to the time of day or a local holiday, ensuring that the content feels relevant to the user’s current situation.
- Device, Browser and Operating System: Information about the user’s device, browser type and operating system because the technology we use says more about us than we think.
- Session Data: It tracks session information to understand the user’s journey through the site. This includes details about:
- Pages visited: It generates summaries of the content the user has consumed, allowing it to personalize future messages and make relevant references.
- Entrance and exit: Tracking where users enter and leave the site helps it understand behavior patterns.
- Scroll depth: It measures how far users scroll down each page, helping it analyze engagement.
- Text selection and copy events: It monitors when users select text or copy content, allowing it to understand what information they find most useful.
- Homepage Experience Interaction: On the homepage, it tracks interactions with the dot animation:
- Mouse movement: The dots react to mouse movement and it tracks this data to see how users engage with the animation.
- Displayed word/message combinations: It logs which word/message pairs are shown to each user to avoid repetition and to understand how users interact with the content.
All of this data is stored anonymously in localStorage, meaning no personal identifiers are linked to the information. This allows it to deliver a more tailored experience over time, ensuring that the content and visuals adapt to the user’s preferences and behaviors. Additionally, if users have privacy settings like “Do Not Track” enabled, the system defaults to generic content, maintaining a respectful user experience without personalized data collection.
Privacy and Abuse Prevention
Speaking of which, building an engaging personalized experience is great, but I wanted to try to do it responsibly. The experience only sends anonymous data to OpenAI to generate the messaging and images. The focus is on capturing micro-behaviors and interactions alongside generalized location information to create an engaging and personalized experience. I don’t believe that you need personal information to a create personalized experience. Context and our actions can be a much better signal of our intents.
I’m not going to get too much more specific than I already have about abuse detection, but in general, the system is designed to detect bot activity. If a bot is detected or if privacy settings (like “Do Not Track”) are enabled, the AI falls back to generating random, non-personalized messages. Additionally, it caches word/message combos at the IP level to prevent abuse or excessive API calls.
Conclusion
I hope this is just the beginning of this project. Right now, most of this is being done using GPT-4o-mini but I’d love to see what kind’s of responses I could get from o1. I’ve experimented with it a little already and while it takes forever to generate its responses, the responses were actually pretty cool. In the meantime, I’ll continue to refine the system prompt and data being sent to the model to try and improve the responses and response time.
If you think my home page is cool, please share it. I’d love to see what people think and if anyone has built anything similar out there.